
There are plenty of things to consider when starting your own pole studio or becoming…
How to Build a Website, Step by Step
This resource focuses on each step to purchasing, hosting, and building a website. A website is a good way to showcase all of your products and services, tell the world about your business, and help promote it online. While having a good social media presence is also important, you don’t own that content and you could be subject to updating terms of service for that platform’s provider. Building and maintaining your own website ensures you keep control of your content.
There are a few terms to go over before you begin:
- Domain: This is your website’s URL or the name of your website. This is how you get your own business name on the web or your web address.
- Registrar: Your domains are held by registrars who help you find a domain that does not already exist and register it under your ownership.
- TLD: This is the information after your domain name, typically after a dot. .com, .au, .co.uk are all examples of a TLD.
- DNS: Short for Domain Name System, this is the connection between your registrar and your hosting provider.
- Host:Your host is where your website will live allowing it to remain online and visible to users across the globe. Hosts have server racks, which are tiny computers that are always running. Each server can hold a certain amount of information and stores the data from your website. Space for data can be limited and it takes money to maintain those servers, so hosting providers sell this virtual space for a monthly or annual fee.
- SSL Certificate: This is short for Secure Sockets Layer Certificate. This is a standard certificate that should be able to be installed by your hosting provider. This helps protect your site from hackers and makes it more secure for users to browse. This is also how you get your website on what is called a HTTPS:// protocol, instead of HTTP://. The S stands for “secure.” This is required to be correctly indexed through major search engines. If you do not have an SSL, someone going to your website may receive an error.
- CMS: This is short for Content Management System. This is the platform that your site will be built on after it is hosted. This is where you change the layout, design, and functionality of your website.
Buying the Domain
To buy a domain, you must first find out what domain name you want to buy. Instant Domain Search is an excellent way to brainstorm names and find suggestions, otherwise, your registrar – where you buy the domain name – will also be able to tell you which name is taken and which is not.
Google Domains is by far the easiest way to register your domain name. Hosting providers will also often provide a way to register a domain name, but this can be a more expensive way to purchase a domain name. Simply type in your desired domain name in and it will tell you whether it is available or not.
![]()
Choose a .com TLD if you are in the US, otherwise, use your country’s standard domain name. Opting for .net, .biz, or other types of custom TLDs are not going to benefit your business when trying to acquire new customers.
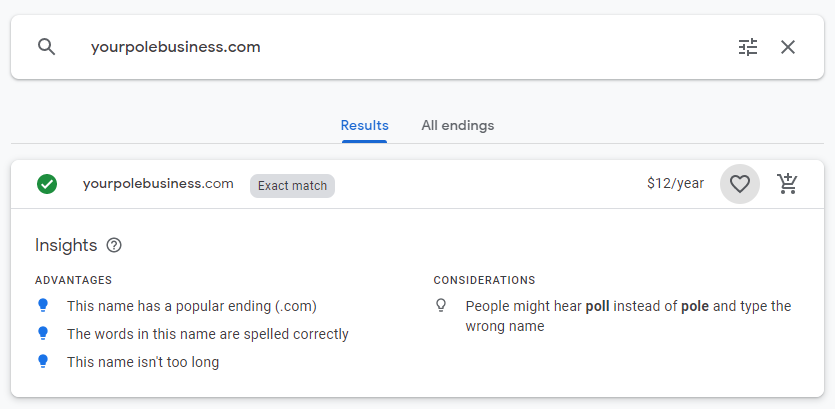
Only one domain name will be available per TLD. So, YourPoleBusiness.com may be available, but once you register it as yours, that doesn’t stop someone from registering YourPoleBusiness.net, or YourPoleBusiness.co.uk.
You can, if you wish, purchase multiple TLDs if you are concerned about your domain name being bought on other TLDs. These can and should be redirected to your main website URL with the standard TLD.
From here, checkout with your new website. Domains will cost money on an annual basis, but it will not typically get higher than $2/month unless the domain name is highly sought after, or if you are purchasing with a host. Hosting providers tend to upcharge on domain names, versus buying directly from the registrar.
Privacy Protection is not necessary, but it is worth purchasing if you do not want your purchaser information to be visible on the web. This information may include address, name, phone number, and potentially your email address. By selecting this information, it is protected by a service called ICANN, who inserts their information into the public search instead.
Auto-renew is good to connect so you do not risk losing your domain due to non-payment once time comes for your domain to renew.
If you are registering with Google domains, G Suite Basic will allow you to have a custom domain email. It is recommended to at least have one of these emails that you manage.
Choosing and Connecting the Host
Choosing The Host
There are many hosting providers that you can choose from, and they all range in features, functionality, and price. Some CMS’ – what you build your website with – will host your website for you.
We recommend choosing a hosting provider based on your experience with building a website if you will be building it yourself, or, if you are hiring a professional.
If you are building your website yourself, either do your own research into what host is right for your needs or choose from these recommendations which make building a website without expert help much easier. They all still have some level of “learning curve” so do your research before deciding on which one to use:
- Wix
- Weebly
- Squarespace
- Shopify (for products)
These are website builders that will host your website for you, and feature drag and drop optimization.
For professional website builds, your web designer should have a recommendation, otherwise choose from these recommendations:
The main thing you want to look for in a host if you are having it professionally done is access to a CPanel, which is the technical backend of your website that the server holds, and a free SSL certificate.
Connecting the Host
The way to connect a hosting provider to your CMS of choice can vary depending on the host you are using and the CMS you are using.
Almost always, the host will be able to provide additional instructions on these steps.:
You, or your hired professional will need access to the registrar to modify the DNS – this tells the registrar which host they should provide a connection to. The host will require you to “verify” your domain with them, which is essentially them making the other end of the connection with your registrar.
Your DNS may require some time to propagate before you can access your website publicly. This ‘propagation’ typically takes 24-48 hours, and occasionally longer.
Choosing a CMS
If you did not choose a website builder, then you have several CMS’ to choose from.
The CMS you choose should depend on your needs for a website. If you are selling a service, Shopify is your best bet. If you are just advertising your studio, then a drag-and-drop website builder will be fine. If you want something general purpose, WordPress is a popular choice.
A list of CMS’ you can choose from:
- Drupal
- Joomla
- Magento
- WordPress
These all essentially do the same thing.
Most hosting providers will give you an option to “Install WP” which is short for “Install WordPress.” If you choose to go with WordPress, this is what you want to install.
If you ever need assistance, your hosting provider should provide you with answers and basic services through the chat.
Installing an SSL Certification
An SSL Certificate, also known as a Secure Socket Layer, is an important part of your website. This is the certificate that will help protect your website from hackers and identity theft in the case that users are entering their personal information on your website.
Typically, you can either click “Install SSL” from your hosting provider, or ask them to install it for you. You should see your website marked with a HTTPS:// in front of the domain name when you visit it publicly, or if you visit the administrator backend.
Building a Website
This is a very and potentially complicated topic by itself. To start, here are some basics that you should keep in mind:
Necessary Pages
For service-based sites, at least include the following pages:
- Homepage
- Services Overview
- Services Detailed (more information on each service on different pages or sections as needed)
- Contact Us/Location
- About Us and FAQs relevant to your business
- Privacy Policy (especially if you are impacted by GDPR) + Terms of Service
For product-based sites, at least include the following pages:
- Homepage
- Products
- Product Categories
- Product Pages
- Product Categories
- Contact Us/Location (if applicable)
- About Us and FAQs relevant to your business including Shipping Information
- Checkout (typically auto generated for you)
- Policies: Return Policy, Privacy Policy, Terms of Service
Color and Design Tips
Your site should not contain more than three main colors. Your primary color, which in this example is a dark blue, your secondary color, which is the yellow in this example, and a tertiary color which is a brighter blue or orange in this example depending on the elements on page.
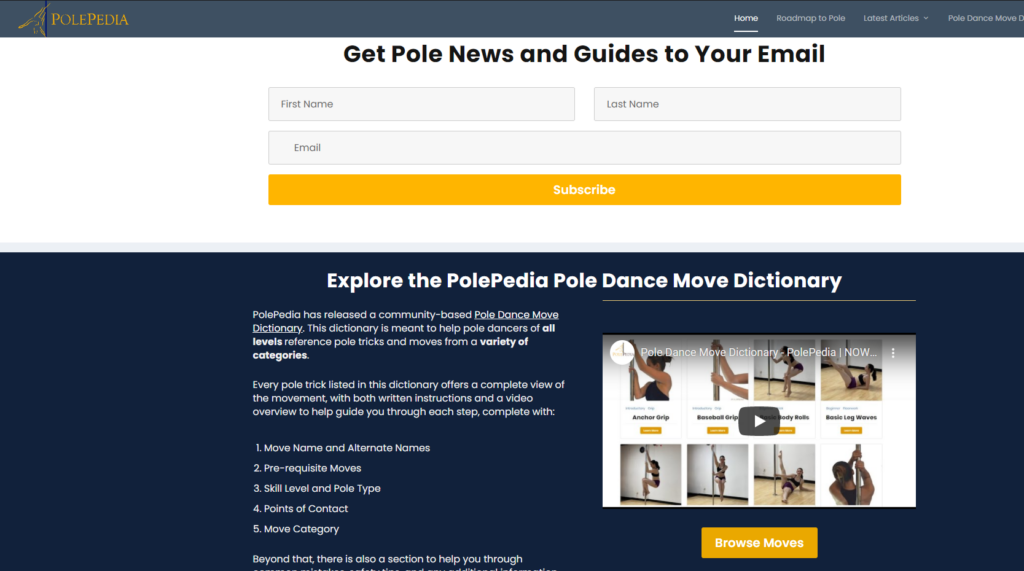
Here, we can see that the buttons are attention-grabbing at a glance because they are brighter than the rest of the elements on page, but they still stick to the color scheme. Any Call to Actions (CTAs), which tell the user the next steps to take on page should be attention grabbing.
It is important to note that you do not want more than 2 elements CTAs on any given view of the screen. In this example above, you can see the “subscribe” and “browse moves” buttons are plenty of CTAs for the eyes to look at at once, and any more would be visually cluttered.
As a golden rule, you do not want to have any more than 2-3 CTAs per 500 words of content.
As a secondary golden rule, stick with colors that are okay on the eyes when viewed on the screen. Bright colors should never be used as backgrounds, avoid pure black elements, and keep a cohesive color design.
Bright colors should be reserved for important elements on page, such as button and logos, whereas backgrounds should have muted, low contrast elements.
Text should be easy to read and highly visible – again, using dark greys instead of deep blacks – otherwise you may strain the users eyes as they read on a cell phone or desktop.
A color palette generator may help you visualize your website’s colors better.
What’s Next?
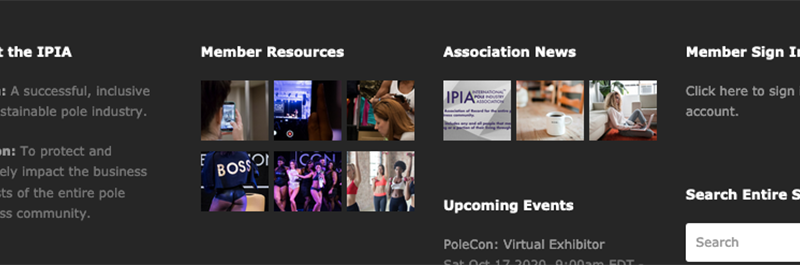
Ready to build your own website? Great! Looking for a resource to help? Check out the IPIA Member Directory to find a pole based business that specializes in pole websites.
You may also like